
How to...
- Set-up Email Signature in Sigsync
- View signature while composing emails (Outlook Add-in)
- Create & design email signature templates with ease
- Set Department / Job title wise signatures
- Centrally manage entire team with single signature
- Collect user feedback, CSAT survey through signature
- Schedule your email signature for marketing campaigns
- Dynamically Insert vCard (Contact) as QR code in signature
- Smart Host / your email security settings
- SPF, MX Record Management
- Good Practices for designing an email signature
Set-up Email Signature in Sigsync
Sigsync allows you to set-up and centrally manage Office 365 email signatures for all the users in your organization.
Follow the below steps to set-up your centralized email signature using Sigsync
- Step 1: Login to the Sigsync ‘Dashboard’
There are two different ways you can login to the Sigsync Dashboard
- Login directly using your Office 365 credentials
- Login using your registered email address and password

Click here to know the steps to create an account and log in to the Sigsync Dashboard
- Step 2: Register and configure your Office 365 tenant in Sigsync
Once you log in to the Sigsync Dashboard, the next step is to add your Office 365 tenant. Registering your tenant allows Sigsync to securely connect with your Microsoft 365 environment and centrally manage email signatures for all your users and mailboxes.

Click here to know the steps to add your Office 365 tenant in Sigsync.
- Step 3: Create, Design, Edit your Email signature Templates
Sigsync offers a flexible and easy-to-use Signature Editor to create and design your email signature templates. Using this editor, you can:
- Choose from pre-designed templates in the Signature Gallery
- Import an existing signature by uploading your HTML code
- Create a signature from scratch using blank layouts
The intuitive editor makes it simple to customize your signatures and apply them consistently across all users in your organization.

Click here to know the steps to create your signature template
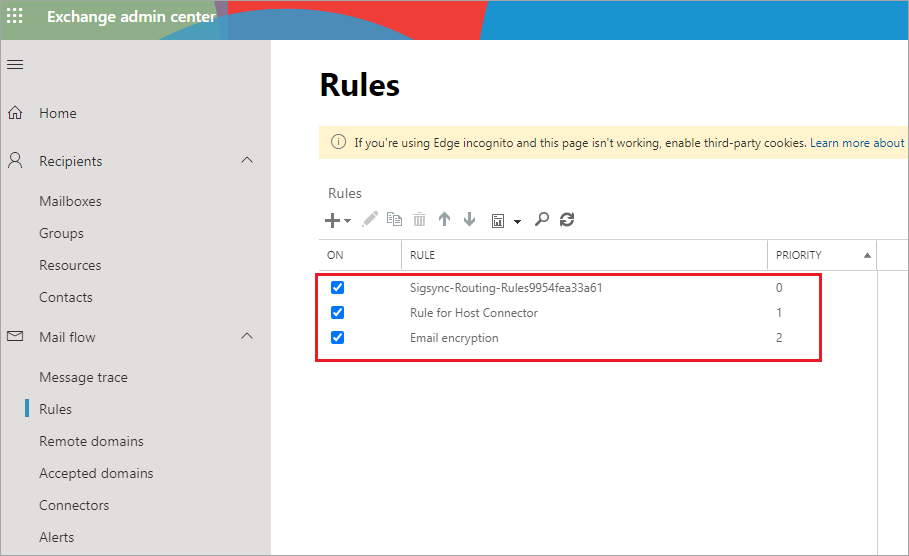
- Step 4: Set signature rules
Signature rules let you control how email signatures are applied based on the conditions you define. For instance, you can apply different signatures based on the sender, recipient, keywords in the subject or body of the email, and other custom criteria.

Click here to know the steps to set a signature rule and to assign a signature template.
- Step 5: Add SPF record
Adding an SPF record is important because it helps receiving mail servers verify that your emails are sent from authorized servers. Without an SPF record, your messages are more likely to be marked as spam, junk, flagged as spoofing or phishing attempts, or even rejected by the recipient’s mail server.

Click here to know the steps to add Sigsync domain in the SPF record.
Note: This is an optional step and can be applied only if the emails are marked as spam, junk, spoofing, or phishing by the receiving server.
That’s it! Once you’ve completed the above steps, you’re ready to start sending emails, and your outgoing messages will include the required email signature.
Note: If you are behind the third party smart host services such as
1. Proofpoint
2. Barracuda
3. Mimecast
4. Reflexion and similar solutions, you may find an email without the signature applied.
Click here to know the settings to manage smart host services.
View signature while composing emails
Are you looking for a way to view your signatures while composing an email message? For instance, you might want to check the disclaimer added to the email or preview your name and contact information before sending the email to your recipients. Sigsync can help you with this by enabling you to view your email signatures while you compose an email. Simply deploy the Sigsync Signatures Outlook Add-in for a specific user or for all users in your organization. After you deploy the Add-in, you can preview the signature in Outlook.
Steps to deploy Sigsync Signature Add-in for Outlook
Click here to know the steps to deploy Sigsync Signatures Outlook Add-in.
Opening Sigsync Signatures Add-in pane in Outlook and Outlook Web Access (OWA):
When you are composing a new email or reply to / forward a message in an Outlook desktop app, click the 'Sigsync Addin for Outlook' button on the ribbon to open the Add-in pane.

To open the Add-in pane in Outlook on the web (OWA), click the Sigsync Signatures Add-in for Outlook button at the bottom. If the button is not there, click 'more option (...)' to find the Add-in.

Preview signatures using Sigsync Signatures Outlook Add-in
The signature preview is based on the signature rules that you set and the corresponding signature templates. If you have made any changes in signature rules or templates, close the Add-in pane and relaunch to reflect the changes.

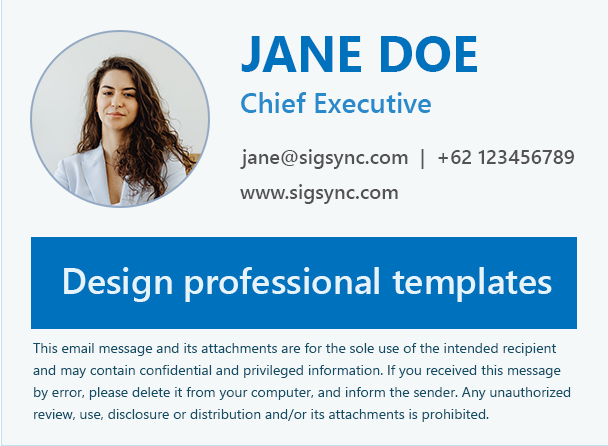
Design email signature templates
Sigsync Office 365 email signature software helps you design professional and consistent email signature templates for your organization. With an easy-to-use Signature Editor, you can customize layouts, colors, fonts, images, and branding elements to match your business identity. This ensures every email sent by your users carries a professional, standardized signature that aligns with your organization standards.
- Login to Sigsync Dashboard.
- Select the 'Manage Signatures' tab and click the 'Signature Editor' tab from the dashboard.

Click here for the videos to create email signature templates
Set Department / Job title wise signatures
If you are looking for a way to set up separate email signatures for a specific department or based on the sender’s job title, Sigsync is here to help. You can enable specific, customized signatures for different departments or employees job titles within your organization, giving each signature a unique, professional touch.
Steps to set-up department wise signature
For an instance : Set up Signature for 'Marketing' department
- Create signature rule

- Give the ‘Rule name’ and click the 'Save' button

- Assign the required signature template

- Select the 'Senders' tab and check 'Azure AD Filters' and click the 'Edit' icon under 'Add Signature - based on Senders' section

- Set the Azure Active Directory fields conditions and click the 'Add to list' button. Choose the filter matching criteria and click the 'Save' button

- Save the signature rule.

Steps to set-up job title wise signature
For instance: Set up Signatures for 'Software Analyst'.
- Create signature rule

- Assign the required signature template

- Select the 'Senders' tab and check 'Azure AD Filters' and click the 'Edit' icon under 'Add Signature - based on Senders' section
- Set the Azure Active Directory fields conditions and click the 'Add to list' button. Choose the filter matching criteria and click the 'Save' button
- Save the changes

Centrally manage entire team with single signature
Are you finding it difficult to manually update signatures for all of your employees in your organization? Make use of Sigsync centralized email signature solution for your team and say goodbye to manual updates, inconsistent signatures, and time-consuming operations. With Sigsync, you can:
- Centralize the signature process for your team, ensuring a consistent and professional image for your organization.
- Set up unified signatures for a specific team, users and groups in Microsoft 365
- Ensure that all signatures are accurate and up to date with a centralized signature management system.
- Automate the signature update process, saving time and effort for your IT team.
- Control how and when the signatures are added to your emails as well as the rule execution flow.
- Control email signature preview for signatures added in Outlook
Sigsync centralized features that help you create consistent signatures
1. Single signature template with the Active Directory fields
If you use active directory fields such as givenName, surname, profilePhoto, jobTitle, department in the signature, Sigsync automatically retrieves the Azure Active Directory (AD) details and enables you to have a personalized signature for every user. This feature helps you to centrally manage signatures for your entire team with a single signature template.
The following steps describe how to use a single signature template for all users
- Step 1: Login to Sigsync Dashboard
- Step 2: Click 'Manage Signatures' and then select the 'Signature Gallery' tab

- Step 3: Pick a template from the Sigsync template gallery

The template is loaded into the signature editor. The following fields in the template such as ${givenName}, ${surname}, ${jobTitle}, ${businessPhones}, $mobilePhone}, ${mail} and ${profilePhoto} are the Active Directory fields that change dynamically for different senders

You can customize the template by adding other signature components or proceed with the predesigned template.
Click here to to know how to edit the signature templates
- Step 4: Preview and save the signature template
Enter the sender email address to preview the signature. The same template changes dynamically for each user based on the Active Directory details.

After customization, save the template.

2. Manage the empty AD fields in the signature template
When the Active Directory fields such as faxNumber, ipPhone, mobilePhone are not having the values in your Active directory, you can set 'Hide' property in Sigsync to avoid empty space for the corresponding fields in the signature.
In the following screenshot, an empty space is appearing in the preview for the 'Fax Number' field. To remove the empty space, just set the 'Hide' property for the label/icon around the 'Fax Number' field.

Select the label in the design area, go to the Visibility Properties panel, choose the 'Fax Number' field from the list of Active Directory fields, and click the 'Add' button.

3. Add signature for specific groups and departments
Sigsync enables you to assign a signature template to a specific group, team or department.
Click here for the steps to set up department-wise / group-wise signatures
Collect user feedback, CSAT survey through signature
Sigsync allows integrating customer satisfaction surveys in email signatures. With a brief, eye-catching survey in your email signature, you can collect feedback from your customers right away. It is an excellent approach to gather the genuine client insights you need without being intrusive or demanding, whereas traditional survey techniques frequently have low response rates and may not provide the most accurate feedback.
You can integrate the following survey tools in your email signature using Sigsync.
After creating the survey, copy the survey HTML code and paste in the Sigsync editor.
Steps to integrate the CSAT survey in Sigsync Signature
- Login to Sigsync Dashboard.
- Choose 'Manage Signatures' > 'Signature Editor' tab from the dashboard.
- Select the table cell and ‘insert OneClick’ component from the dropdown menu

- Paste the Survey HTML code

- Click the 'Apply' button.
- You can preview the changes at the bottom of the editor.

Schedule your email signature for marketing campaigns
Are you ready to take your marketing campaigns to the next level and make them a smashing success? Look no further than Sigsync! With Sigsync, you can make your marketing campaigns unforgettable and achieve outstanding results. Our centralized solution simplifies the process, enabling you to:
- Add dynamic banners for every occasion: Impress your audience with eye-catching and season-specific banners.
- Increase webinar attendance: Create a custom signature that matches your campaign and easily change the banner and call-to-action to match each new campaign.
- Boost sales with holiday promotions: Schedule email signatures to coincide with holidays and drive sales.
- Improved lead generation: By including links to landing pages or forms in email signatures, you can drive lead generation from campaigns.
Steps to schedule email signatures for marketing campaigns
For instance: Schedule Christmas Signature campaign
Following are the steps to signature campaign
- Step 1: Create Signature Templates with banner
Click here for the steps to create email signature templates

- Step 2: Create a signature rule and assign the signature templates
Click here for the steps to create rule
Click here for the steps to assign signature templates to the rule.

- Step 3: Schedule the signature campaign using Sigsync Scheduler
Select the 'Recurrence pattern', 'Range of recurrence (Start Date / time and End date / time)' and 'Save' the scheduled date.

That is it the signature will be attached on the scheduled date and time.
Benefits of Sigsync email signature scheduler
- Event Promotions: You can use Sigsync scheduler to promote upcoming events, holidays, or sales by adding a promotional banner or graphical message to email signatures.
- Tracking: Sigsync integrates with web-analytics tools such as Matomo, Woopra and Google analytics, which can help you track the effectiveness of your scheduled promotions and campaigns.
- Company Branding: By including your company logo, contact information, and social media links in your email signature, you can increase brand awareness and make it easy for recipients to contact you or learn more about your organization.
- Targeting specific groups: A scheduler can be used to target specific groups of recipients with different promotions, messages or events.
- Seasonal signatures: You can automatically apply time-themed signatures for different seasons of the year, holidays such as Christmas and New Year to make your company and product stand out among your recipients.
Dynamically Insert vCard (Contact) as QR code in signature
Sigsync email signatures make it easier than ever to boost your digital presence. You can now add your vCard or electronic business card as a QR code to email signatures and change them dynamically for each sender. This feature enables recipients to save your contact information in a single click by scanning your QR code image.
Adding a vCard as a QR code in an email signature can help you with the following:
- Quick and easy contact information exchange: The QR code can be scanned with a smartphone, which automatically saves the information contained in the vCard to the user's contact list.
- Consistency in the signature: The information contained in the vCard is stored in a standardized format, ensuring that your contact information is consistent regardless of the device you use.
- Increased exposure: Including a QR code in an email signature can increase exposure to a business or individual's brand and contact information.
- Convenience: Recipients can easily save your information without having to manually enter it into their contact list.
Sigsync provides the option to dynamically Insert vCard (Contact) as QR code in email signature signature. Simply drag and drop the QR code component into the design area and create a QR code image from text input. In order to customize the generated QR codes based on the message sender, you may additionally include Active Directory fields.
Click here for the steps to Dynamically Insert vCard (Contact) as QR code in signature

Click here for the steps insert vCard as link in email signature
Alias email signatures
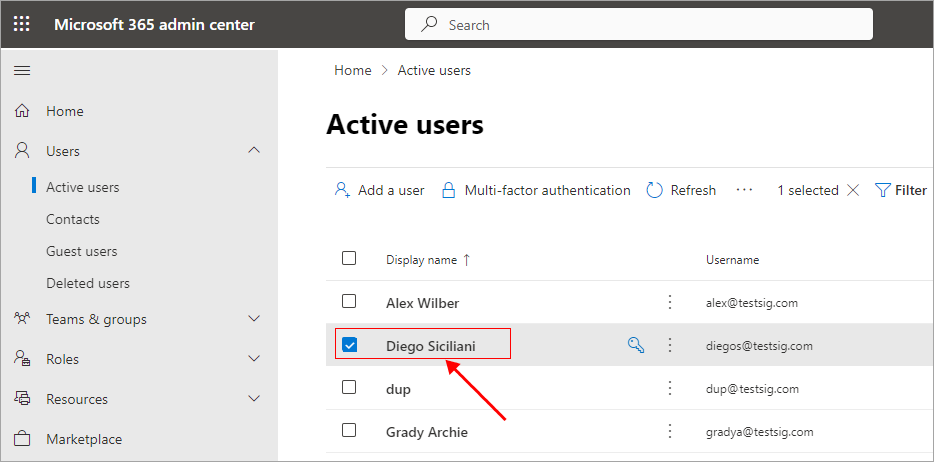
Sigsync supports the signatures to emails sent through alias addresses. They come in handy if you don't want to give out your primary email address to everyone. Since there are no Active Directory fields for alias email addresses, you have to include the alias address in custom attributes in Office 365 Admin Center. Then, sync the AD changes in Sigsync and include the alias address in the Signature rules.
Click here for the steps to add email signature to alias email address
Smart Host / your email security settings
If you use a third party host services such as Proofpoint, Barracuda, Mimecast, Reflexion etc. along with the Sigsync email Azure service, there may be a chance that your email without adding a signature. To resolve this, ensure that your emails are directly routed to Sigsync Azure Service before it is relayed to any other third party host services.
Click here for the steps to setup smart host (mail relay) services to work with Sigsync service
SPF, MX Record Management
SPF Record
An SPF(Sender Policy Frame) record lists the domains and mail servers that are authorized to send emails on your domain's behalf. To let the servers at the receivers' end know that Sigsync is permitted by your domain to process the emails, you have to add the Sigsync domain to your SPF record. It prevents the receiving server from any of the emails processed by the Sigsync service as spam, spoofing, junk, or phishing.
Click here for the steps to add SPF record

MX Record
A mail exchanger record (MX record) in the Domain Name System (DNS) contains the address of the mail server in charge of receiving emails on your behalf.
You could get frequent problems like 'Relay Access Denied' while routing emails from Office 365 through Sigsync. When a user who belongs to a domain lacks an MX record in Sigsync, will get an error.
To resolve this, retrieve the MX record from the 'Domains' section in Office 365 admin center and add in the Sigsync.
Click here for the steps to set MX record
Good Practices for designing an email signature
When you send an email out to multiple recipients, adding a professional signature ensures that everyone sees who they are dealing with at first glance. Follow the below points to design a professional email signature template which is consistent across the devices (Desktop, Mac, Mobile) and email clients.
- Use Table (Rows and Columns) format for a consistent signature design
- Dynamic fields to directly pull Active Directory details
- Display / Hide fields property to remove empty AD fields
- Use high resolution images
- Set Alt text for the images
- Use images with PNG or JPG formats
- Allow signatures to be compatible with dark modes
- Sync AD changes for new updates in Active Directory
- Disable default signatures from Outlook
Experience Smarter Email Signatures with a
Free Sigsync Demo
Sigsync email signature service provides effortless, centralized signature management for Office 365 and Exchange.
Our team can assist you in quickly setting up company-wide signatures. Request a free on-demand demo to see
how Sigsync can simplify your email signature management process.

