How to set different banners for different users?
You can set different banners for different users using custom attributes in Sigsync. Set the banner image URL (hosted / linked image url) in the Custom attribute field for the corresponding email address in the Office 365 Active Directory and use that custom banner URL in your signature template.
Steps to set different banners for different senders
Follow the below steps to set two different signatures for an individual user.
- Set the banner image URL (hosted / linked image url) in a custom attribute field in Office 365.
Click here to know the steps to set custom attributes in Office 365 and sync the Active Directory changes in Sigsync
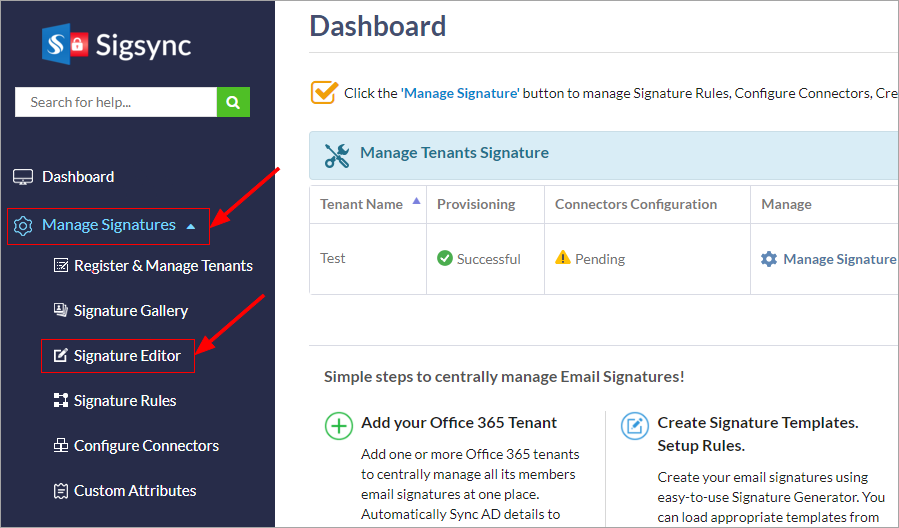
- Now Login to the Sigsync dashboard and launch the Signature editor.
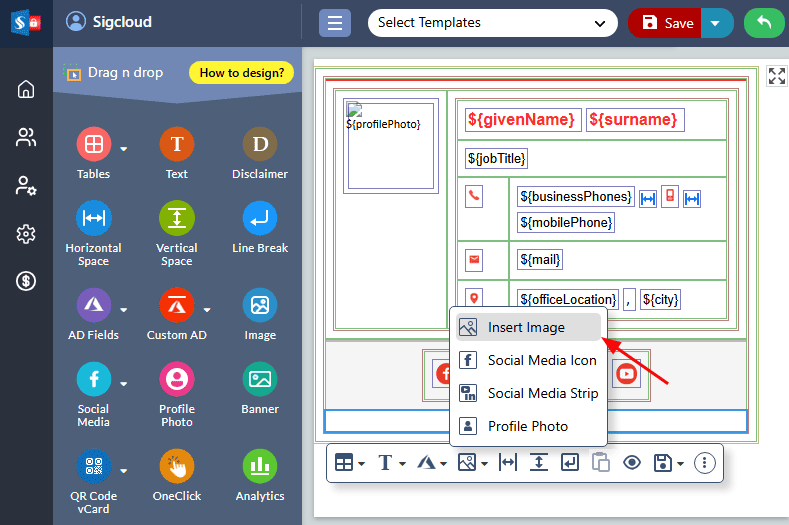
- Select the table cell and choose ‘Insert Image’
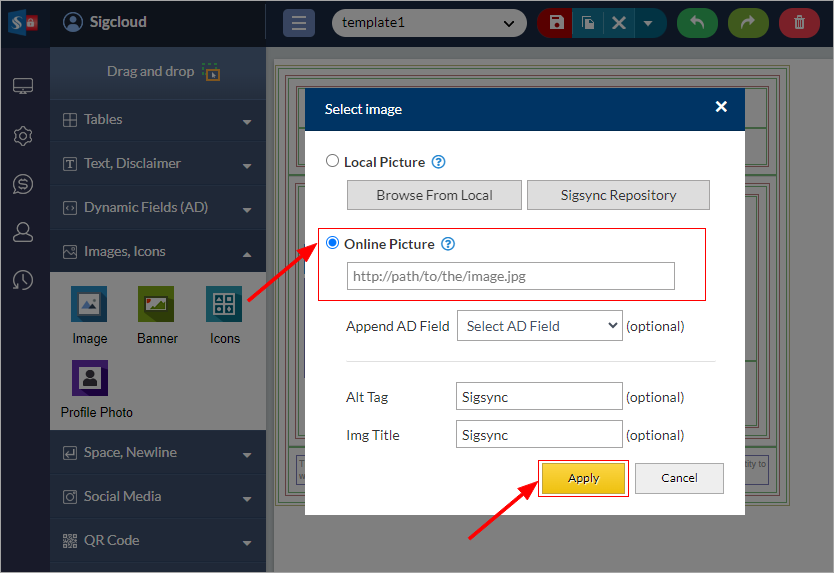
- Now, select the ‘Online Picture’ option and enter the custom attribute variable that you have set previously (say ${customAttribute1} for the first field, ${customAttribute2} for the second and so on) in the ‘URL’ field and click the ‘Apply’ button.
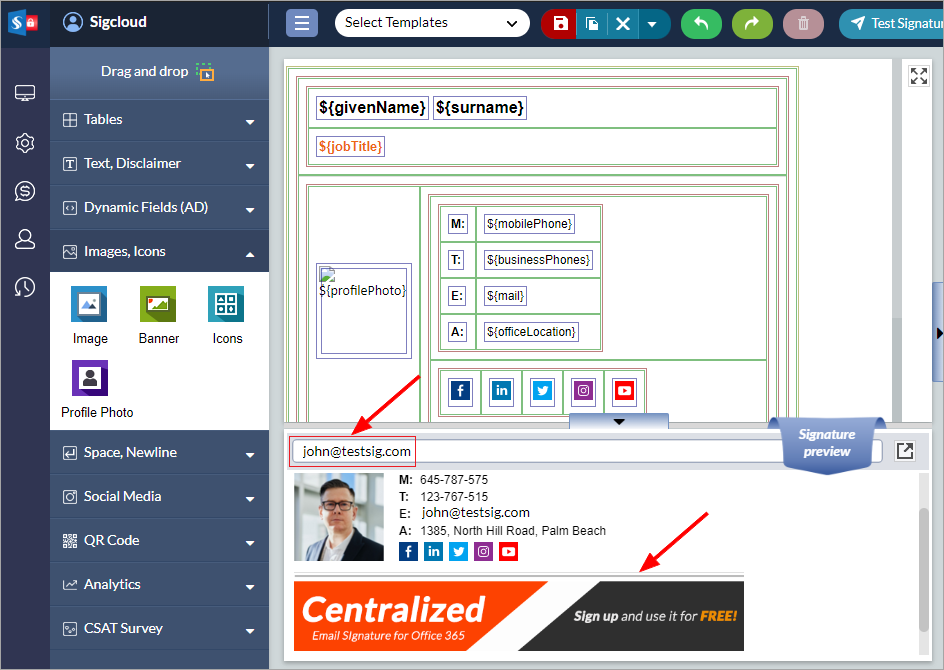
- You can preview the banner for a specific sender by entering the email address of the sender in the search bar of the preview pane
Streamline Email Signature Management with a Free On-demand Demo from Sigsync
Sigsync email signature service provides effortless, centralized signature management for Office 365 and Exchange. Our team can assist you in quickly setting up company-wide signatures. Request a free on-demand demo to see how Sigsync can simplify your email signature management process.
