How to create a group and assign members in Microsoft 365 (Office 365)?
Follow the below steps to create a group in Office 365 account
- Login to your Office 365 Exchange admin center
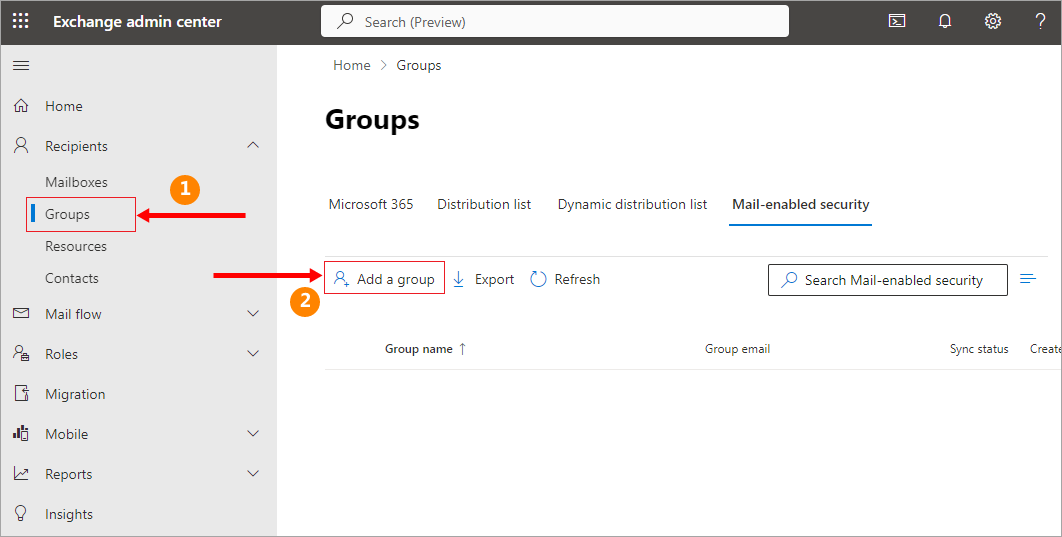
- Navigate to 'Groups' from the left panel and Select 'Add a group'
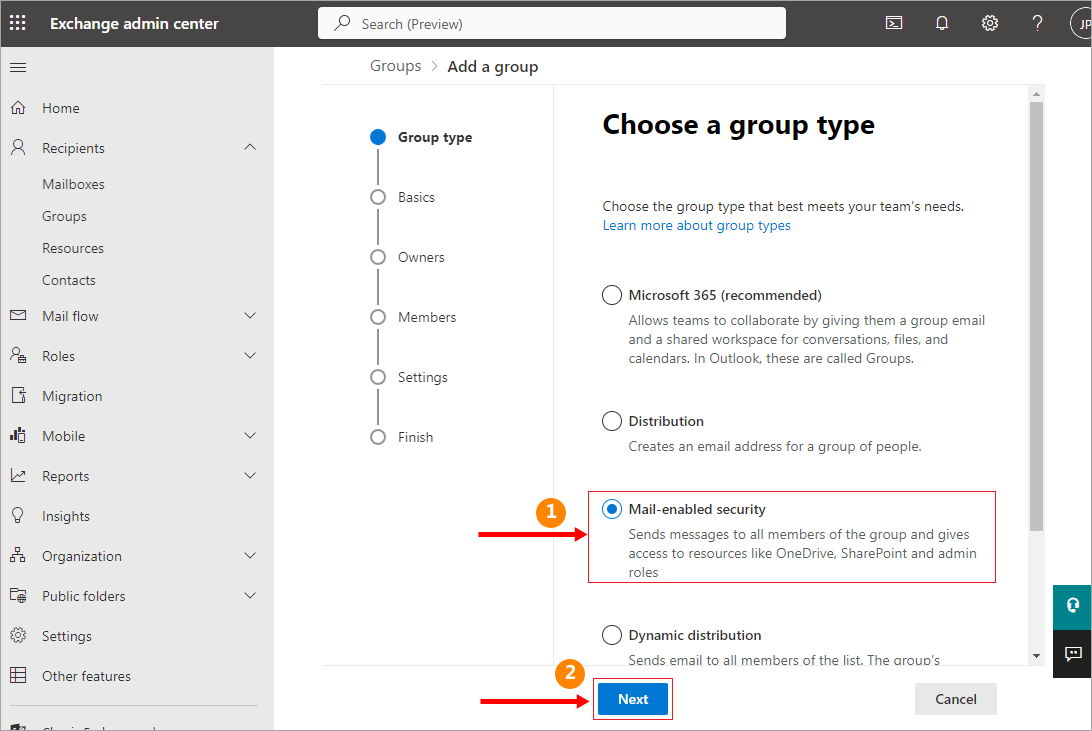
- Choose a group type and click the 'Next' button
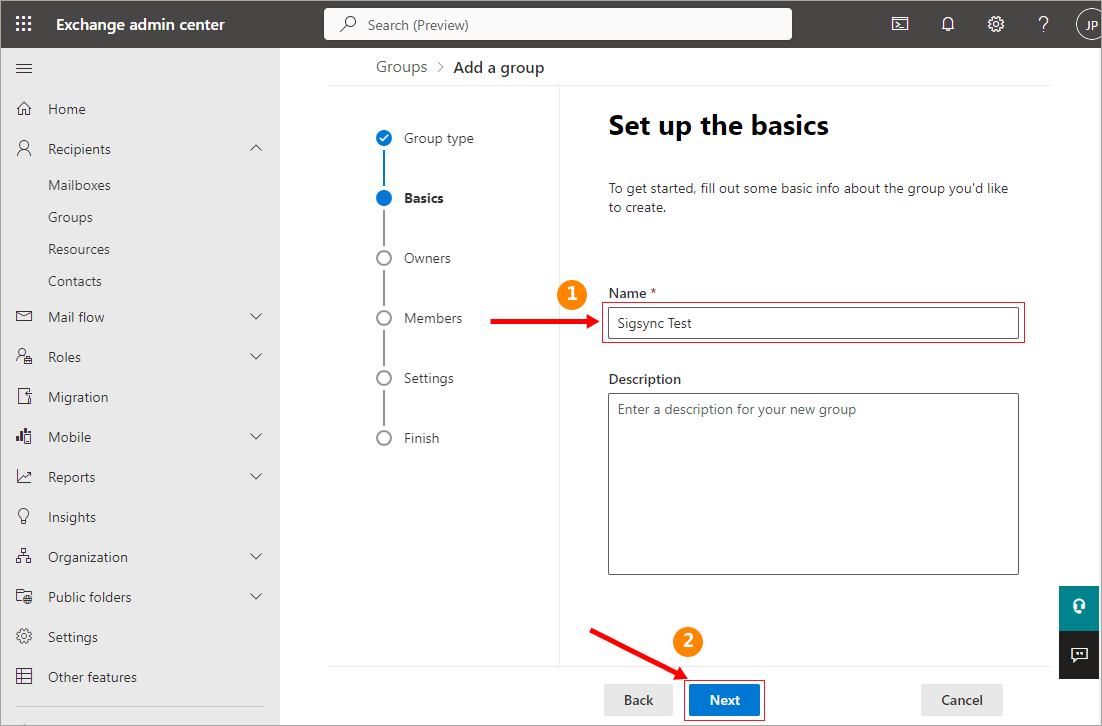
- Give a name to the group and click the 'Next' button
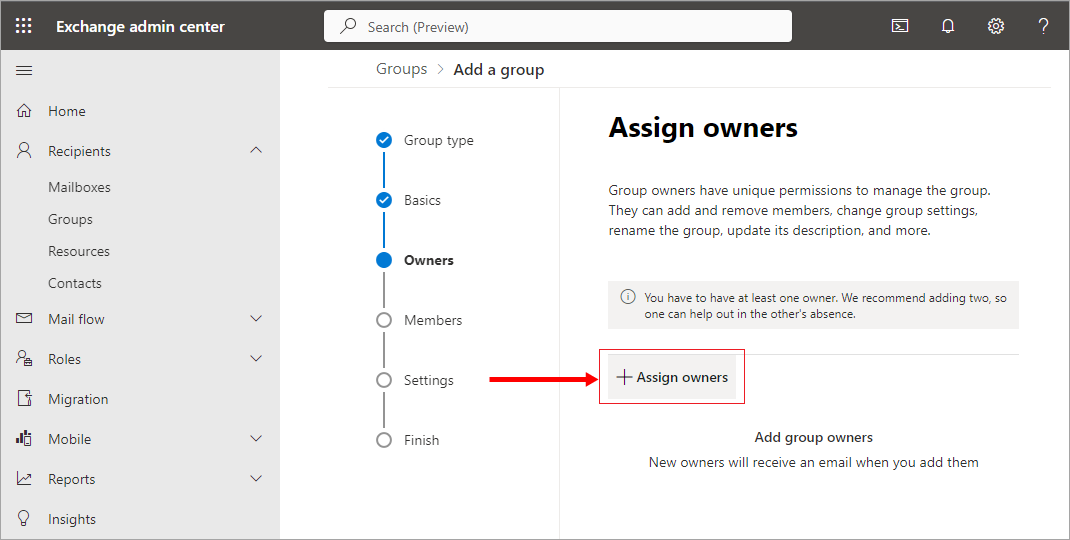
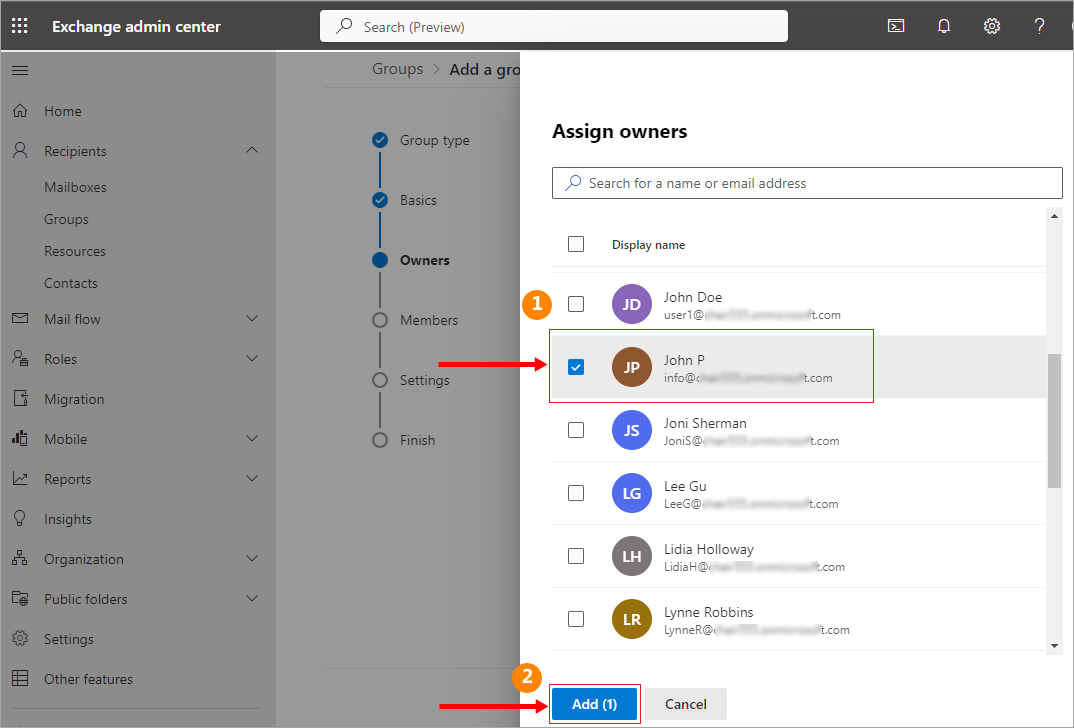
- Click 'Assign owners'
- Select the email address(es) to assign as owner(s) and click the 'Add' button
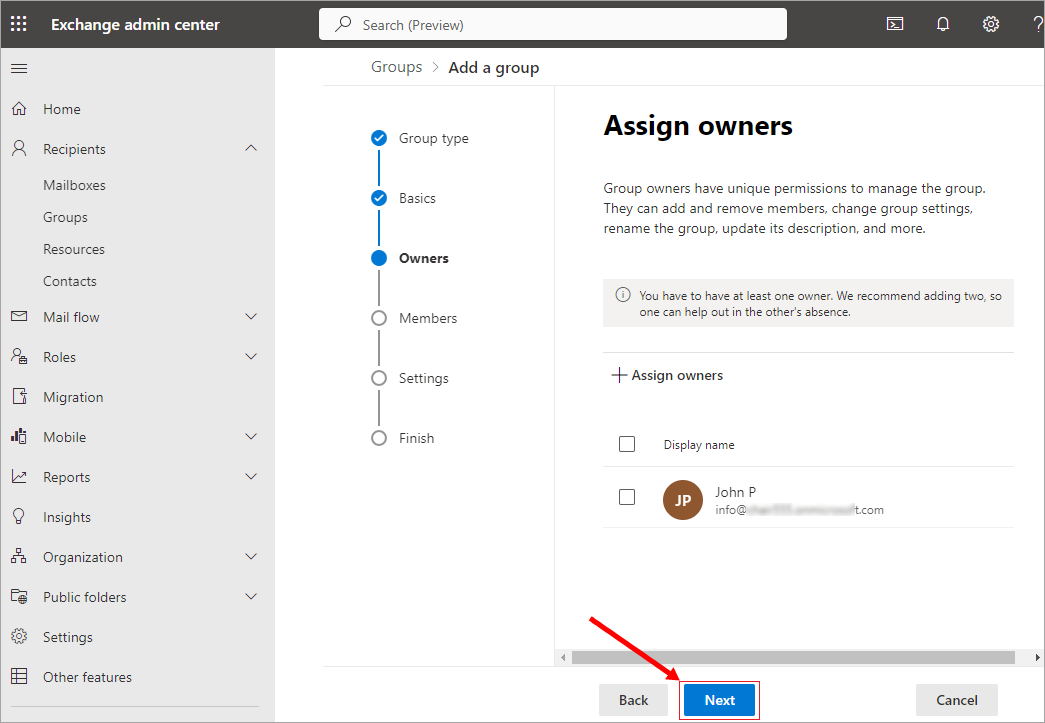
- Click the 'Next' button
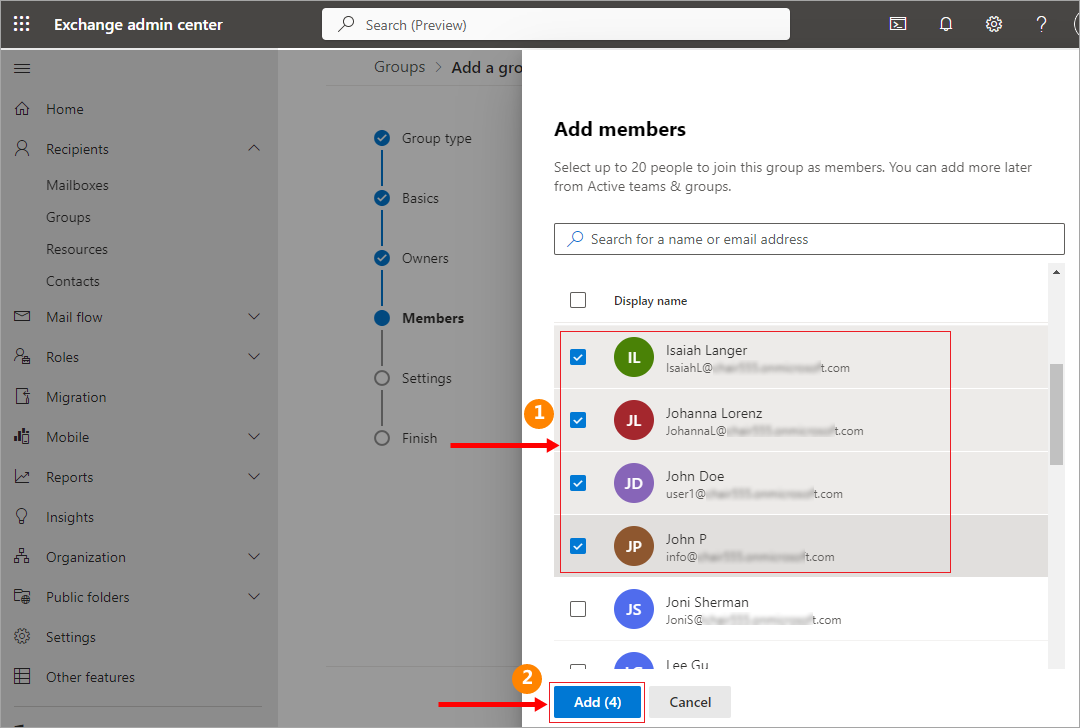
- Select 'Add members' and click the 'Next' button
- Select only the email addresses as members of the group to add signatures and click the 'Add' button
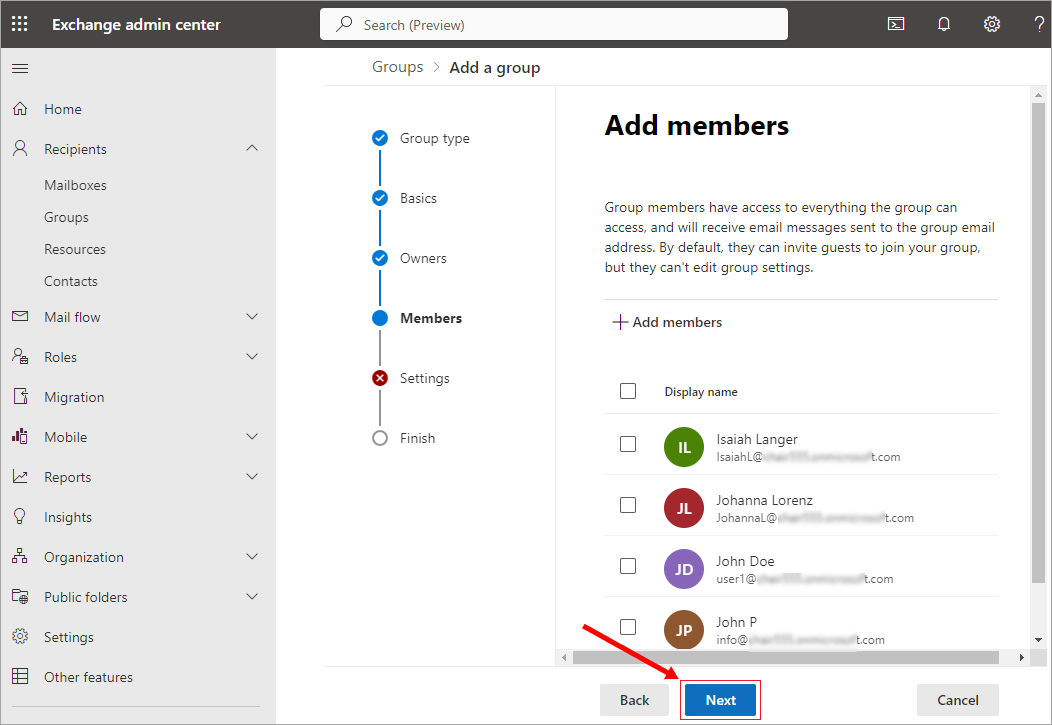
- Click the 'Next' button
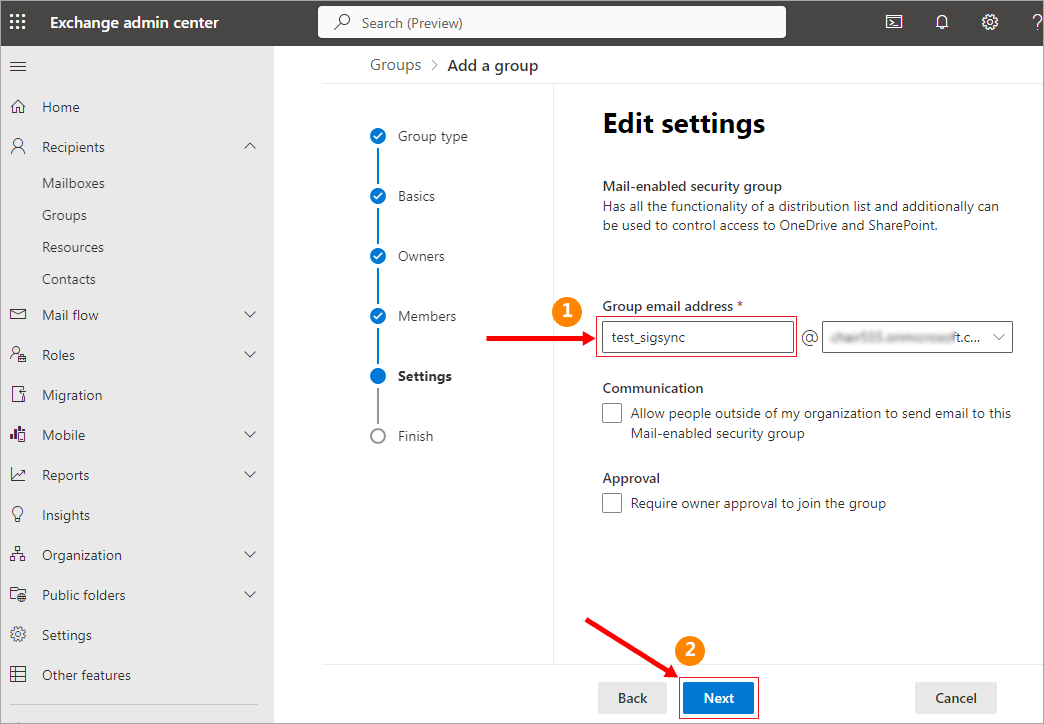
- Enter the group email address and click the 'Next' button
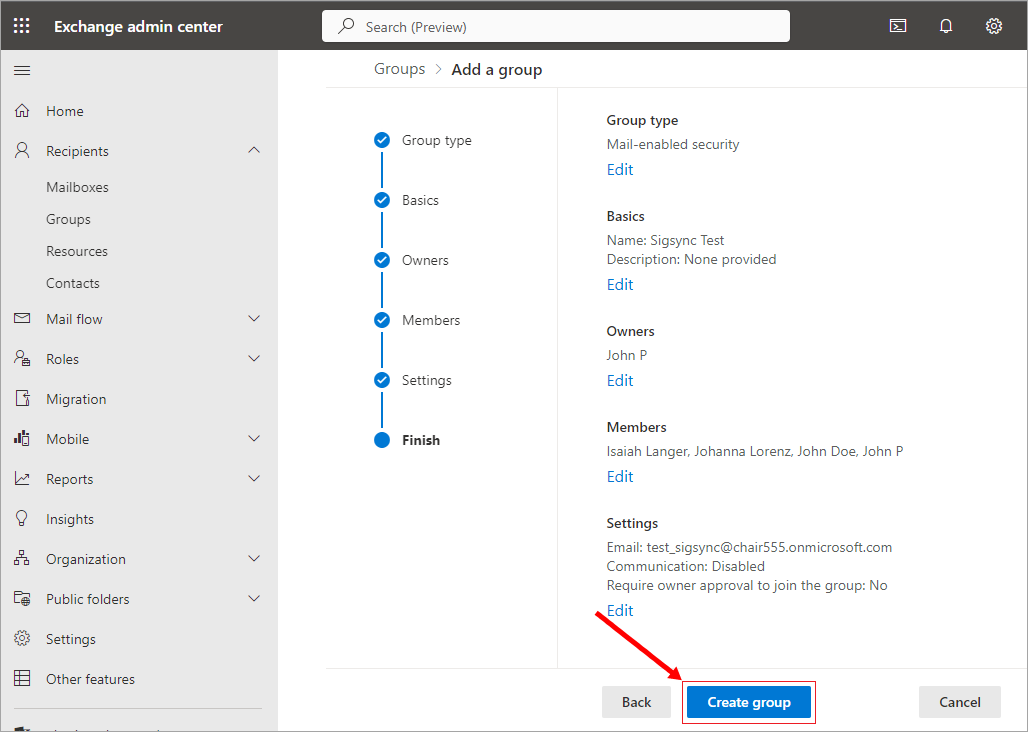
- Click the 'Create group' button
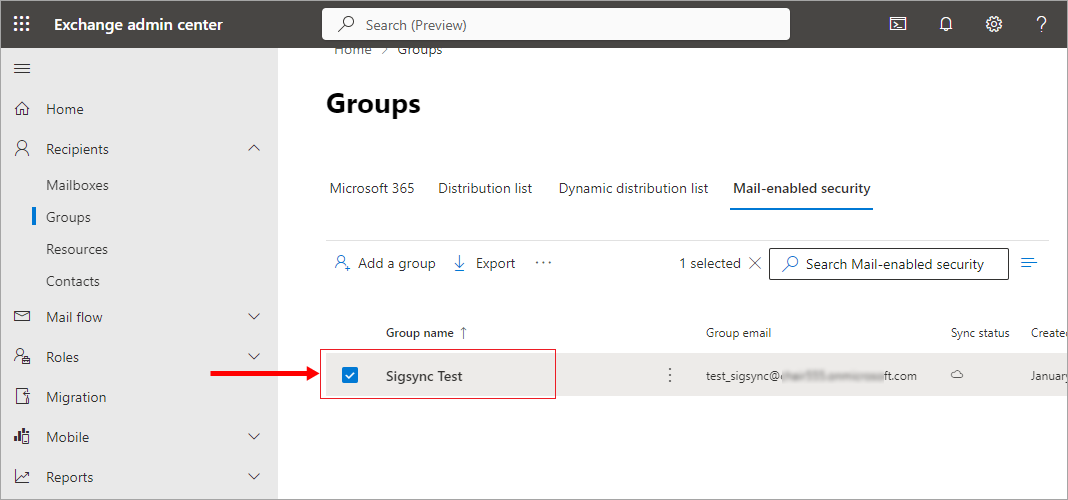
- The newly created group is as shown in the below screenshot.
Streamline Email Signature Management with a Free On-demand Demo from Sigsync
Sigsync email signature service provides effortless, centralized signature management for Office 365 and Exchange. Our team can assist you in quickly setting up company-wide signatures. Request a free on-demand demo to see how Sigsync can simplify your email signature management process.

