How to add two or more images next to each other in email signatures?
You wish to add two or more images next to each other using Sigsync signature template editor.
Resolution:
You need to create a table with separate cells for each of your images in the signature generator to place them next to each other. By using tables, you can ensure that your images appear properly across all platforms and always stay inline. Aligning multiple images side by side requires you to use the following signature components in Sigsync Office 365 Email signature service.
1. Custom Table
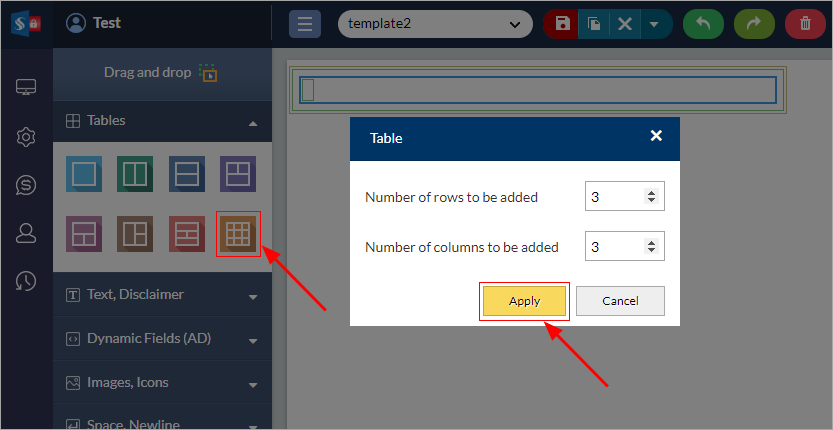
Custom table adds different place holders in the intended row / column to create a unique email signature. Drag and drop the 'Custom Table' into the signature design area and select the number of rows and columns to be added in the table and then click the 'Apply' button.
2. Image
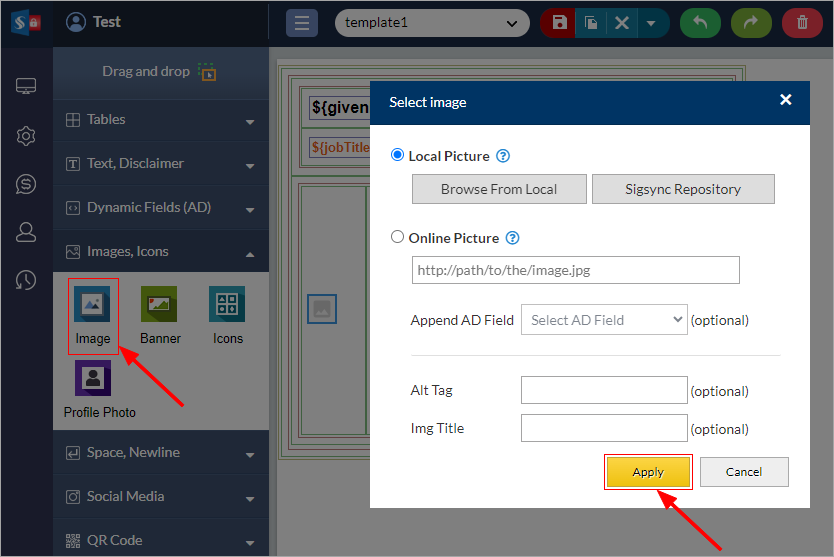
Drag and drop the 'Image' component into the signature design area. Select the image either from your computer or Sigsync repository or you can also load an online image by entering the complete URL. The loaded images can be resized according to your requirements. Enter the appropriate width and height in pixels. Click on the 'Apply' button to apply the changes. Repeat the same procedure to load multiple images.
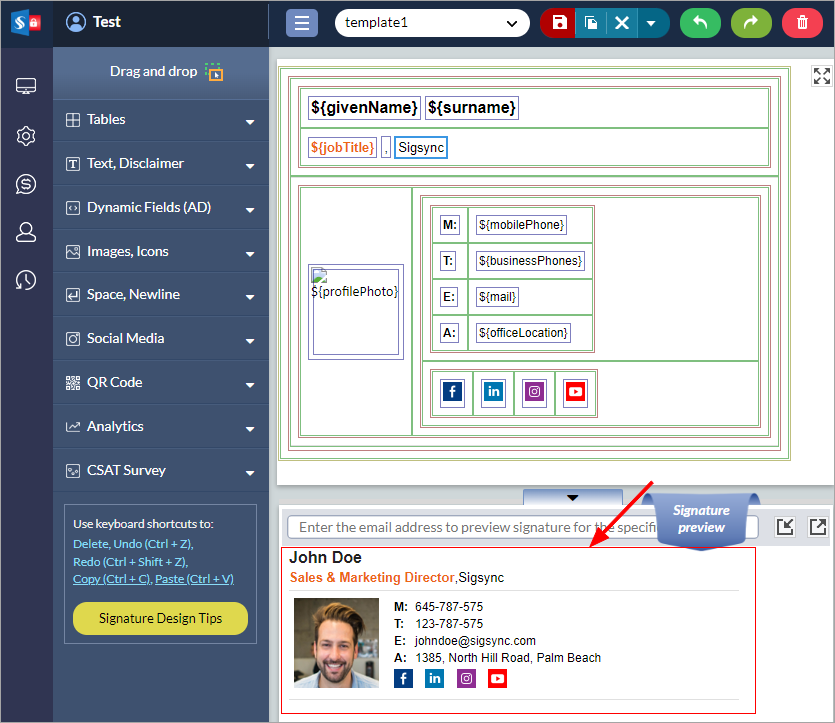
3. Preview Email Signature Template
Verify how the signature template appears in the email when it is updated with all the details. You can click on any user in the list to see how their signature will appear. The details of the preview pane are updated each time after any changes.
Streamline Email Signature Management with a Free On-demand Demo from Sigsync
Sigsync email signature service provides effortless, centralized signature management for Office 365 and Exchange. Our team can assist you in quickly setting up company-wide signatures. Request a free on-demand demo to see how Sigsync can simplify your email signature management process.


