
Microsoft Bookings integration
Microsoft Bookings is an online booking services that allows businesses to create a shared booking platform for multiple users. For instance, an IT support company can establish a centralized booking page where clients can schedule service appointments with various technicians. Additionally, Bookings enables customers or colleagues to arrange meetings directly with you, bypassing the need to send a meeting link.
As part of the Microsoft suite, Bookings integrates with other Microsoft 365 applications like Teams and Calendar. If you are using Sigsync for your Office 365 email signature, you can seamlessly add a link to your booking page.
Why Add Microsoft Bookings Links to Email Signatures?
You can easily integrate your booking page link with the Sigsync Office 365 email signature service. By adding your Microsoft Bookings link to email signatures, you can:
- Enable clients or colleagues to book appointments directly
- Reduce the need for back-and-forth emails
- Provide easy access to your booking interface
- Potentially increase the number of scheduled appointments
- Streamline the booking process for both you and your contacts
To integrate a booking page link into your email signatures, you must configure both Microsoft Bookings and the Sigsync email signature service. Please note that this feature is available only with certain Microsoft 365 business plans.
Set up Microsoft Bookings
Microsoft Bookings offers a variety of straightforward options for configuring and customizing your booking service. We will cover the basics here. For a detailed setup guide, refer to this video.
Basic configuration steps
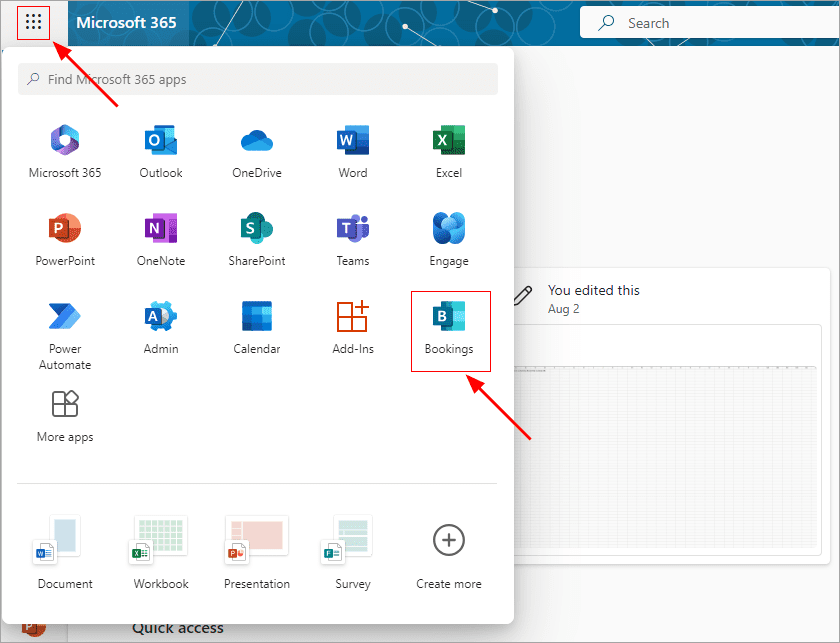
To get started with the Microsoft Bookings service, sign in using your Microsoft 365 credentials at book.ms. Alternatively, you can access the service through the app launcher in the Microsoft 365 portal.
If you’re new to Microsoft Bookings, you'll need to create a booking page. There are two options:
- Common page : This includes all your services and staff members. Customers need to select both a service and a staff member when booking.
- Template Page: This serves as a model for creating individual pages for specific users or groups within your organization. Your clients or colleagues only need to select a service, without choosing a staff member when booking
Whether you use a common page or individual pages, these will solely handle bookings and will not display events or other information from your organization’s Microsoft 365 calendars. However, they will take into account events from your staff's personal Microsoft 365 calendars when showing available time slots.
Difference between Microsoft Bookings and Bookings with me
Instead of creating individual booking pages for each user yourself, you can let users set up Bookings with me and manage the integration on their own, as explained in this article. However, consider these points:
- Booking with me doesn’t provide control over users' booking pages, and users will also need to perform additional steps to add a booking page link to their signatures.
- Each new booking page in Microsoft Bookings creates a new mailbox, which can lead to managing many mailboxes in your Microsoft 365 account.
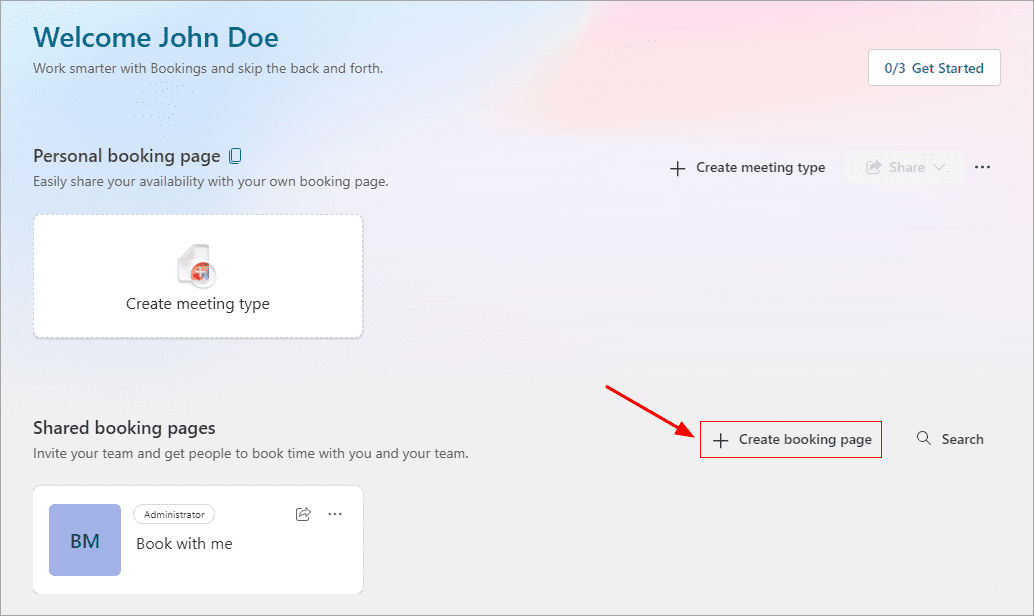
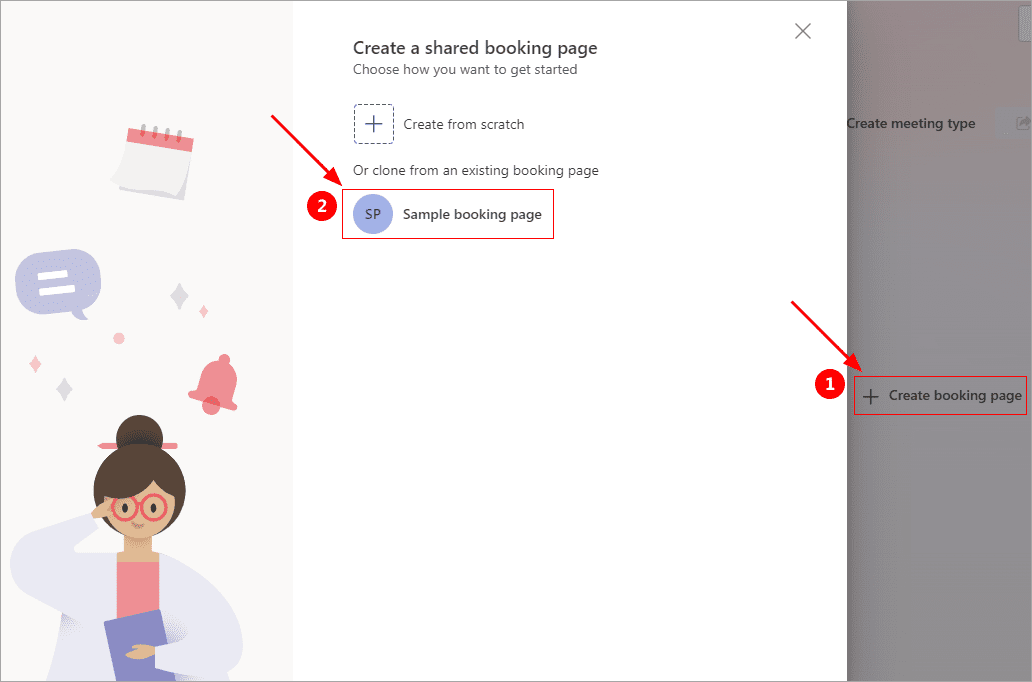
To create a new shared booking page, click ‘Create booking page’
If you opted for a single company-wide booking page, use the wizard to configure essential settings like the page name, business hours, staff details, and available services.
For the multiple booking pages option, use the wizard to set up a template booking page that will be used to create individual pages for users. You can customize this template with any details you choose, such as naming it ‘Sample booking page.’
After entering all the details, click the ‘Create’ button

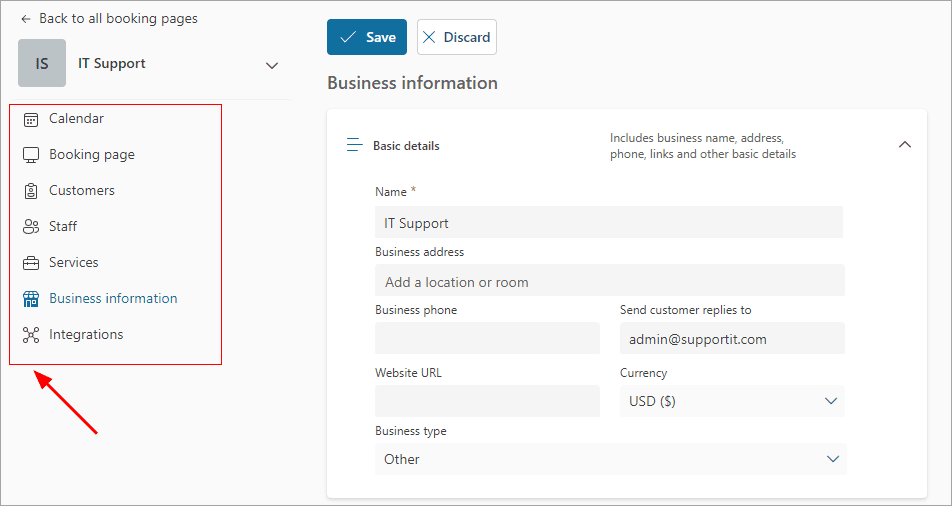
Once your page is created, you'll be taken to its dashboard. Use the left menu to adjust your booking service settings. If you’ve set up multiple booking pages, only configure the settings that will be the same for all or most users (like currency) to avoid having to make changes later.
Business Information: Start here to enter your company’s basic details like name, logo, currency, and phone number.
Services: Use this section to add and set up the services available for booking. For multiple booking pages, add all services to the template page that users will offer.
Staff: Add staff members, both internal and external, who will provide services. For multiple booking pages, include all users in the template page for whom you will create individual pages. By default, they’ll be assigned the Team member role, which is suitable for managing bookings and availability.
Customers: You don’t need to set this up immediately. Customers can be added later, including automatically from bookings.
Booking Page: Set up the details of your booking interface. For template pages, you can skip this step.
Calendar: After the booking page is live, use this section to manage the calendar, including adding customer appointments or adding time off.
Creating the common booking page
In the ‘Booking Page’ settings, you can find the link to your booking page for use in your signatures.
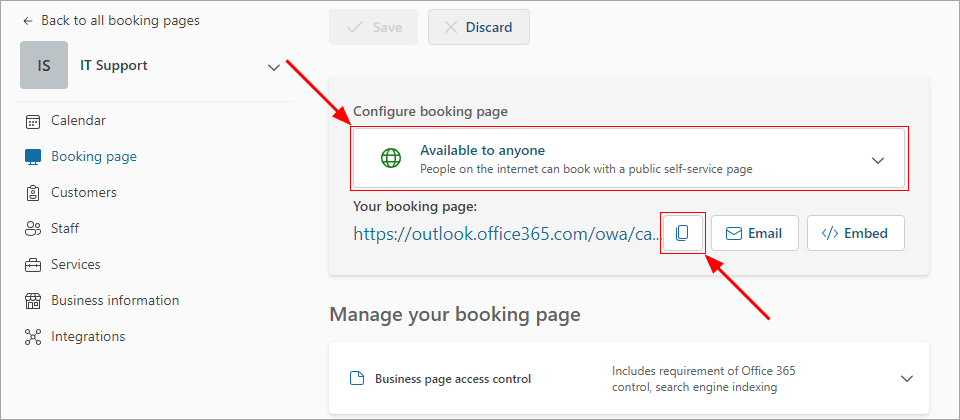
First, decide who can access your booking page. If you offer services to customers, select ‘Available to anyone’ so anyone with the link can access it. If you want to restrict access to your associates within your organization, choose ‘Available to people in your organization’, which limits access to those within your Microsoft 365 tenant.
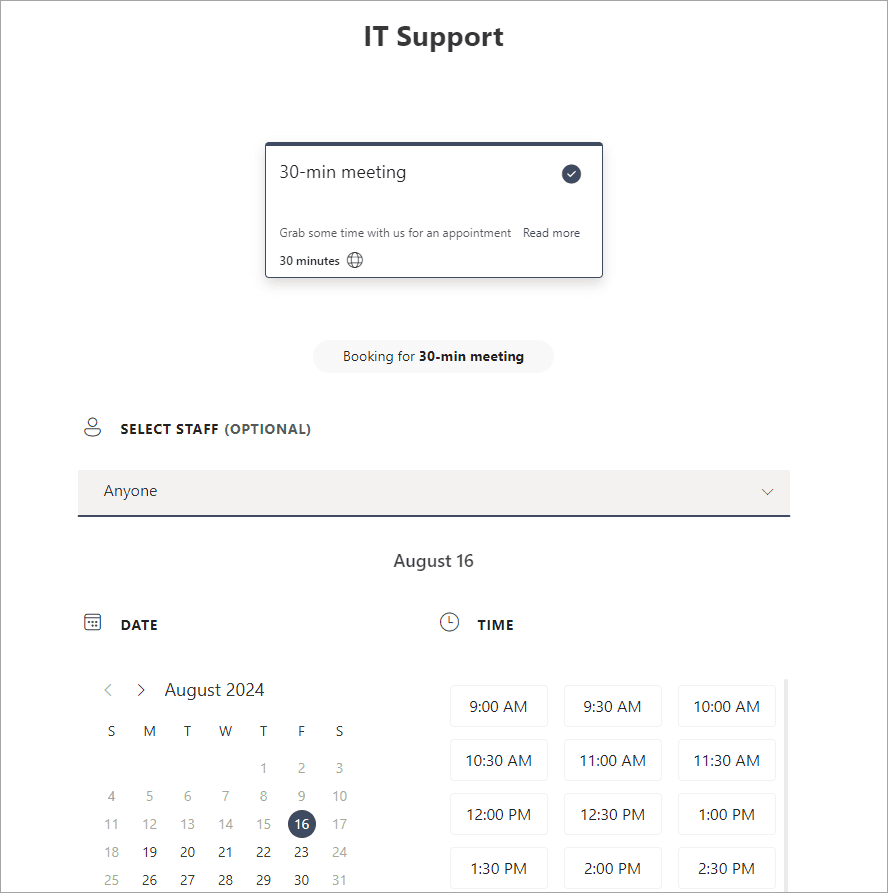
After configuring the settings, publish your booking page by clicking ‘Save’ at the top. You can also click the link to view the page as your customers would see it. Finally, use the 'copy button' next to the link to save it for future use in Sigsync.
Creating individual booking pages
If you want to create individual pages for all or selected users in your organization, you'll need to set up booking pages using the initial template page. Clicking ‘Back to all booking pages’ located in the top left corner of the template booking page dashboard, or sign in at book.ms if you are not already logged in to access the Microsoft Bookings main dashboard.
Then, click ‘Create booking page’ and use your template booking page as the starting point for setting up the first user's booking page
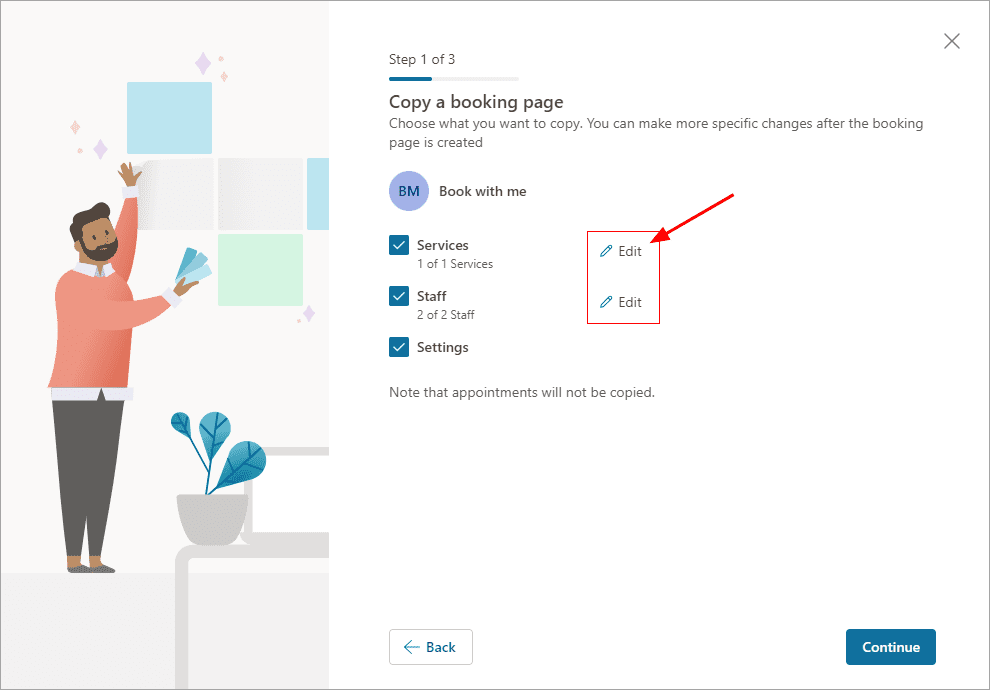
In the initial step of the wizard, click ‘Edit’ to modify the services and staff. To set up individual pages, choose one user and define the services they will offer for booking.
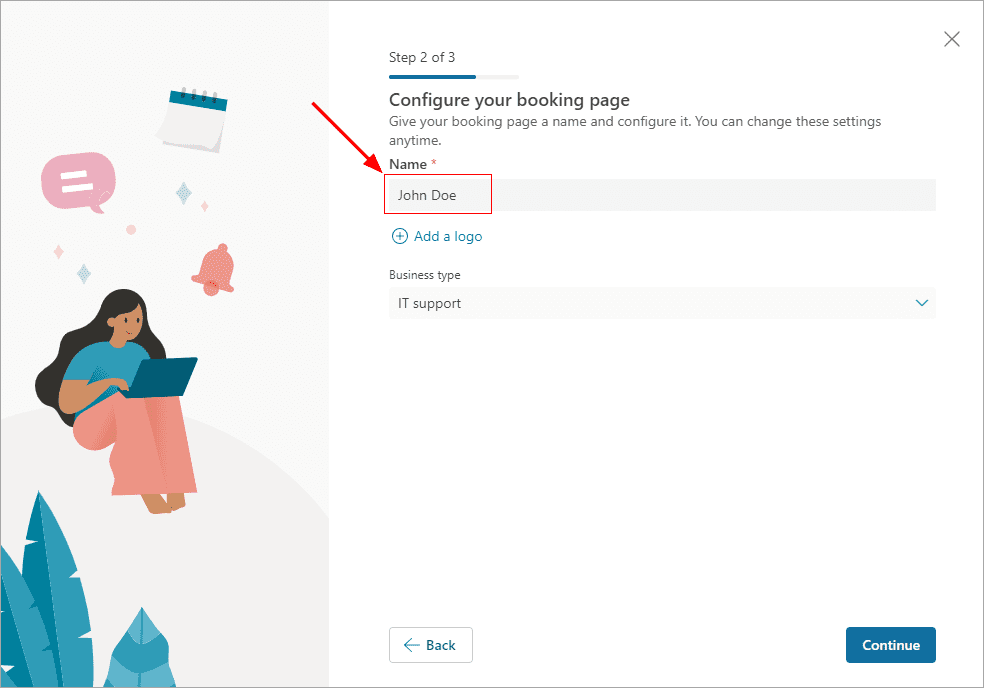
In the next step, the Name field is important because it will be part of the booking page link. Use a uniform naming format for all users helps manage booking pages and integrate with third-party services Sigsync email signature service. For easier integration, use attributes from your Entra ID (Azure AD). In our example, we use the format: '{givenName}{surname}'.
Note:
Spaces are removed from the booking page link, so it will appear in a format like:
https://outlook.office365.com/book/{givenName}{surname}@testdomain.com.
When a booking page is created, it is added to your tenant as a new mailbox, with the name derived from the Name field in the creation wizard. Since each email address in a tenant must be unique, you cannot use the user's existing username for their booking page. For instance, if you have a user with the email JohnD@company.com, you should choose a different name for the booking page, such as John Doe.
Select who is permitted to access this page for booking appointments, then click ‘Create’. You will be directed to the booking page dashboard for the first user, where you can set up and configure all necessary options for that user.

Follow the same steps for the other users . Ensure to use the same naming convention in the Name field when creating the additional booking pages.
Create a generic booking page link following the naming convention you’ve chosen, applicable to all users. For instance, it should look like:
https://outlook.office365.com/book/{givenName}{surname}@supportit.com.
Integrate the booking page link into Sigsync email signature
For common booking page:
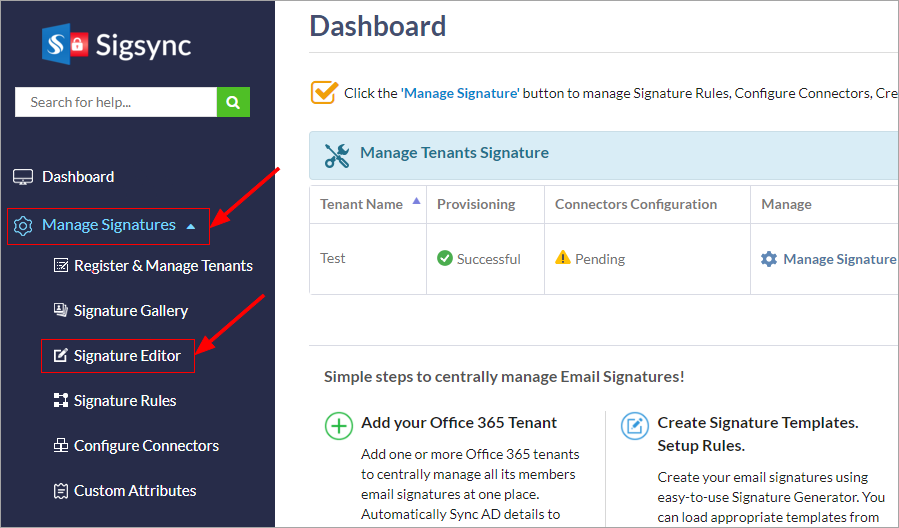
- Login to Sigsync dashboard
- Navigate to ‘Manage Signatures’ > ‘Signature Editor’ tab.
- Select the template you want to add a booking page link and insert the ‘Text’ field component.
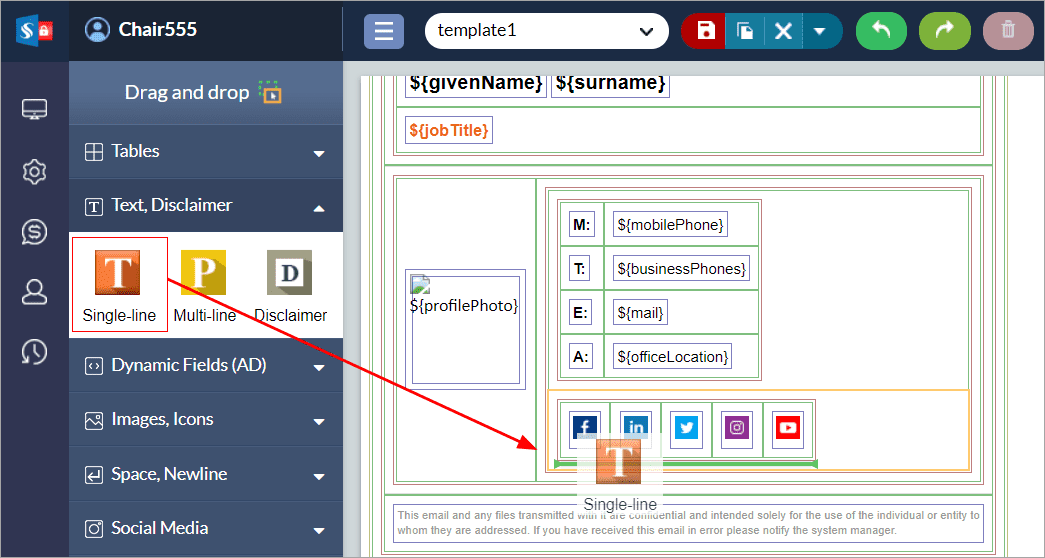
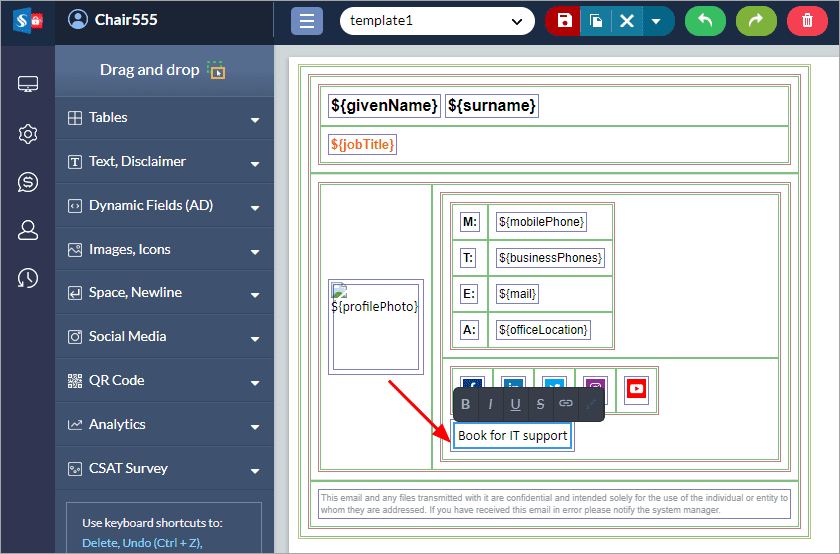
- Select the text and edit it as ‘Book for IT support’
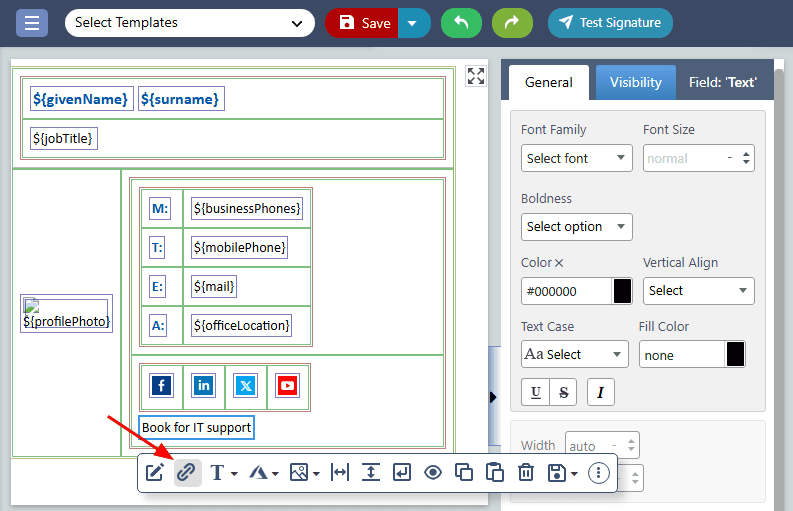
- Select the ‘Book for IT support’ text field, then click on the ‘Hyperlink’ icon.
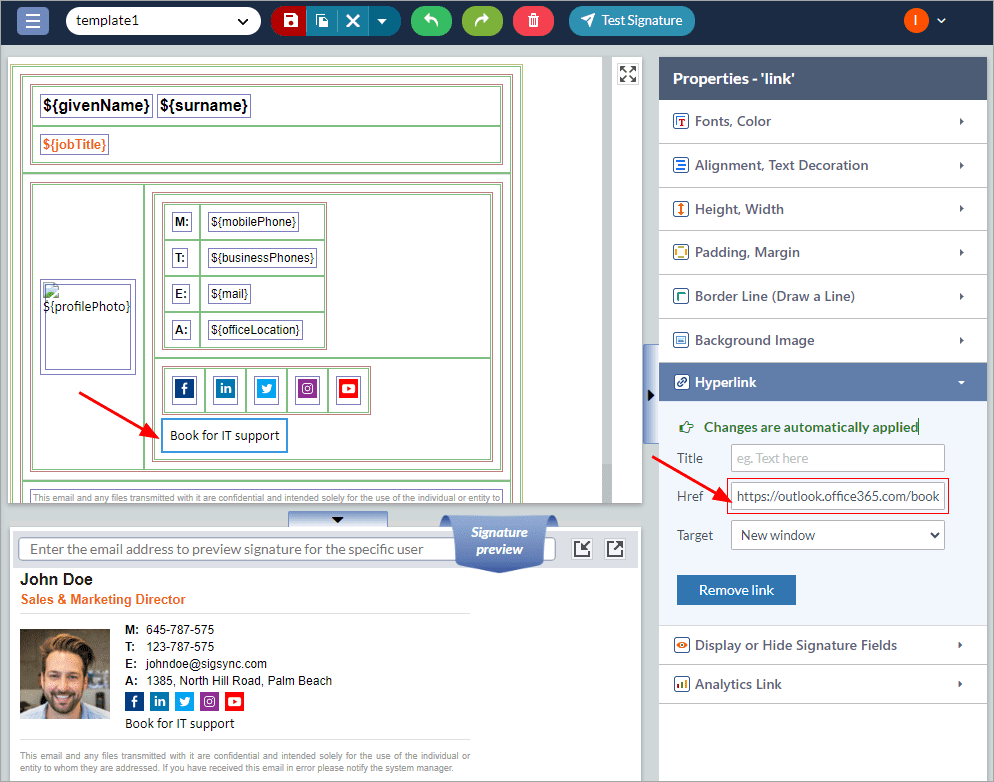
- Insert the following link into the URL field, then click ‘Apply’.
https://outlook.office365.com/book/ITSupport@supportit.com/
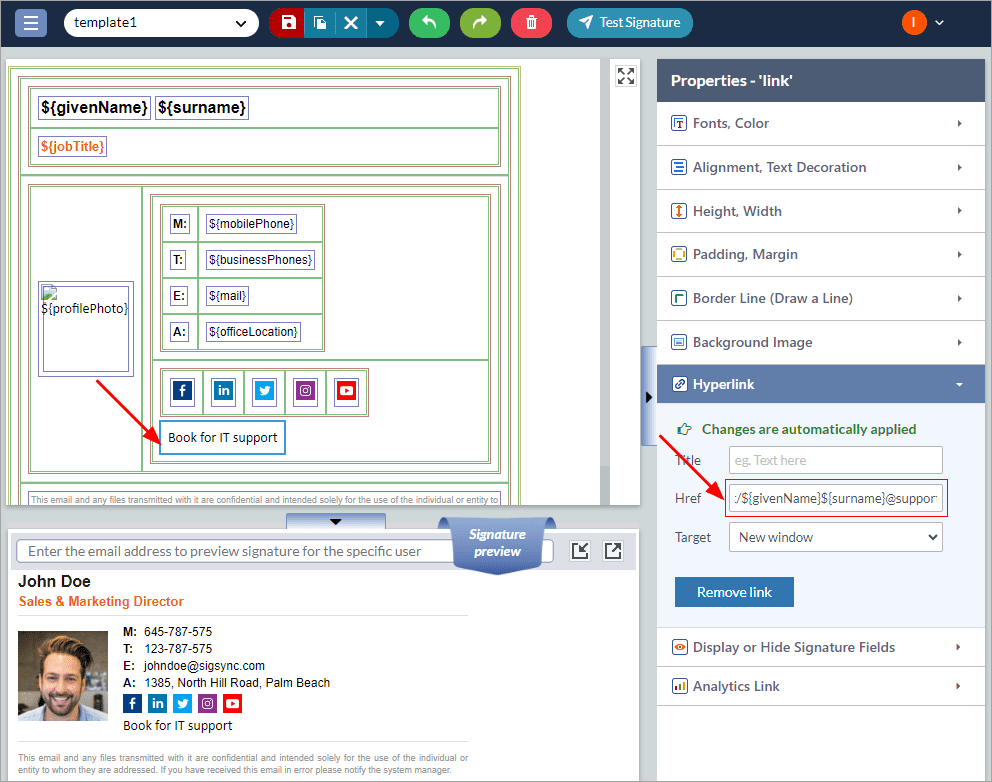
For individual booking page:
Refer the same steps from 1 to 5 as in the previous section
Insert the following link into the URL field, then click ‘Apply’
https://outlook.office365.com/book/${givenName}${surname}@supportit.com/
- Search the sender in the preview pane and preview the changes
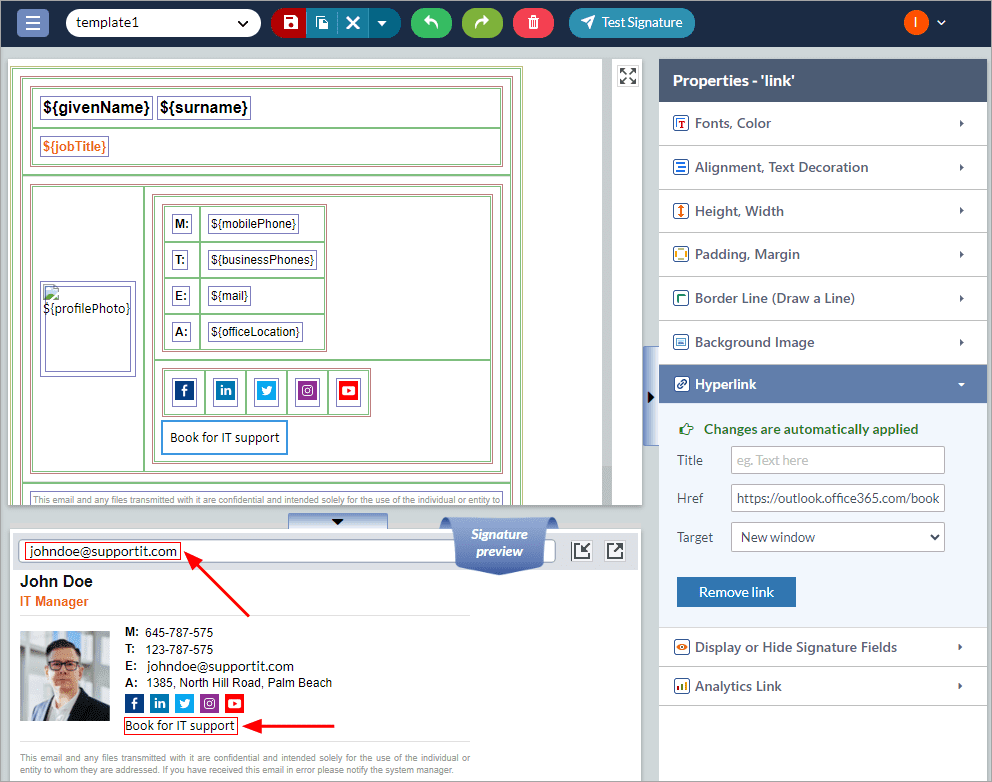
- Now, your email recipients can use the link in the signature to access the booking page and book appointments easily.
Useful Links:
